How to Build a DIY Self-Watering Bucket Container
Materials Needed:
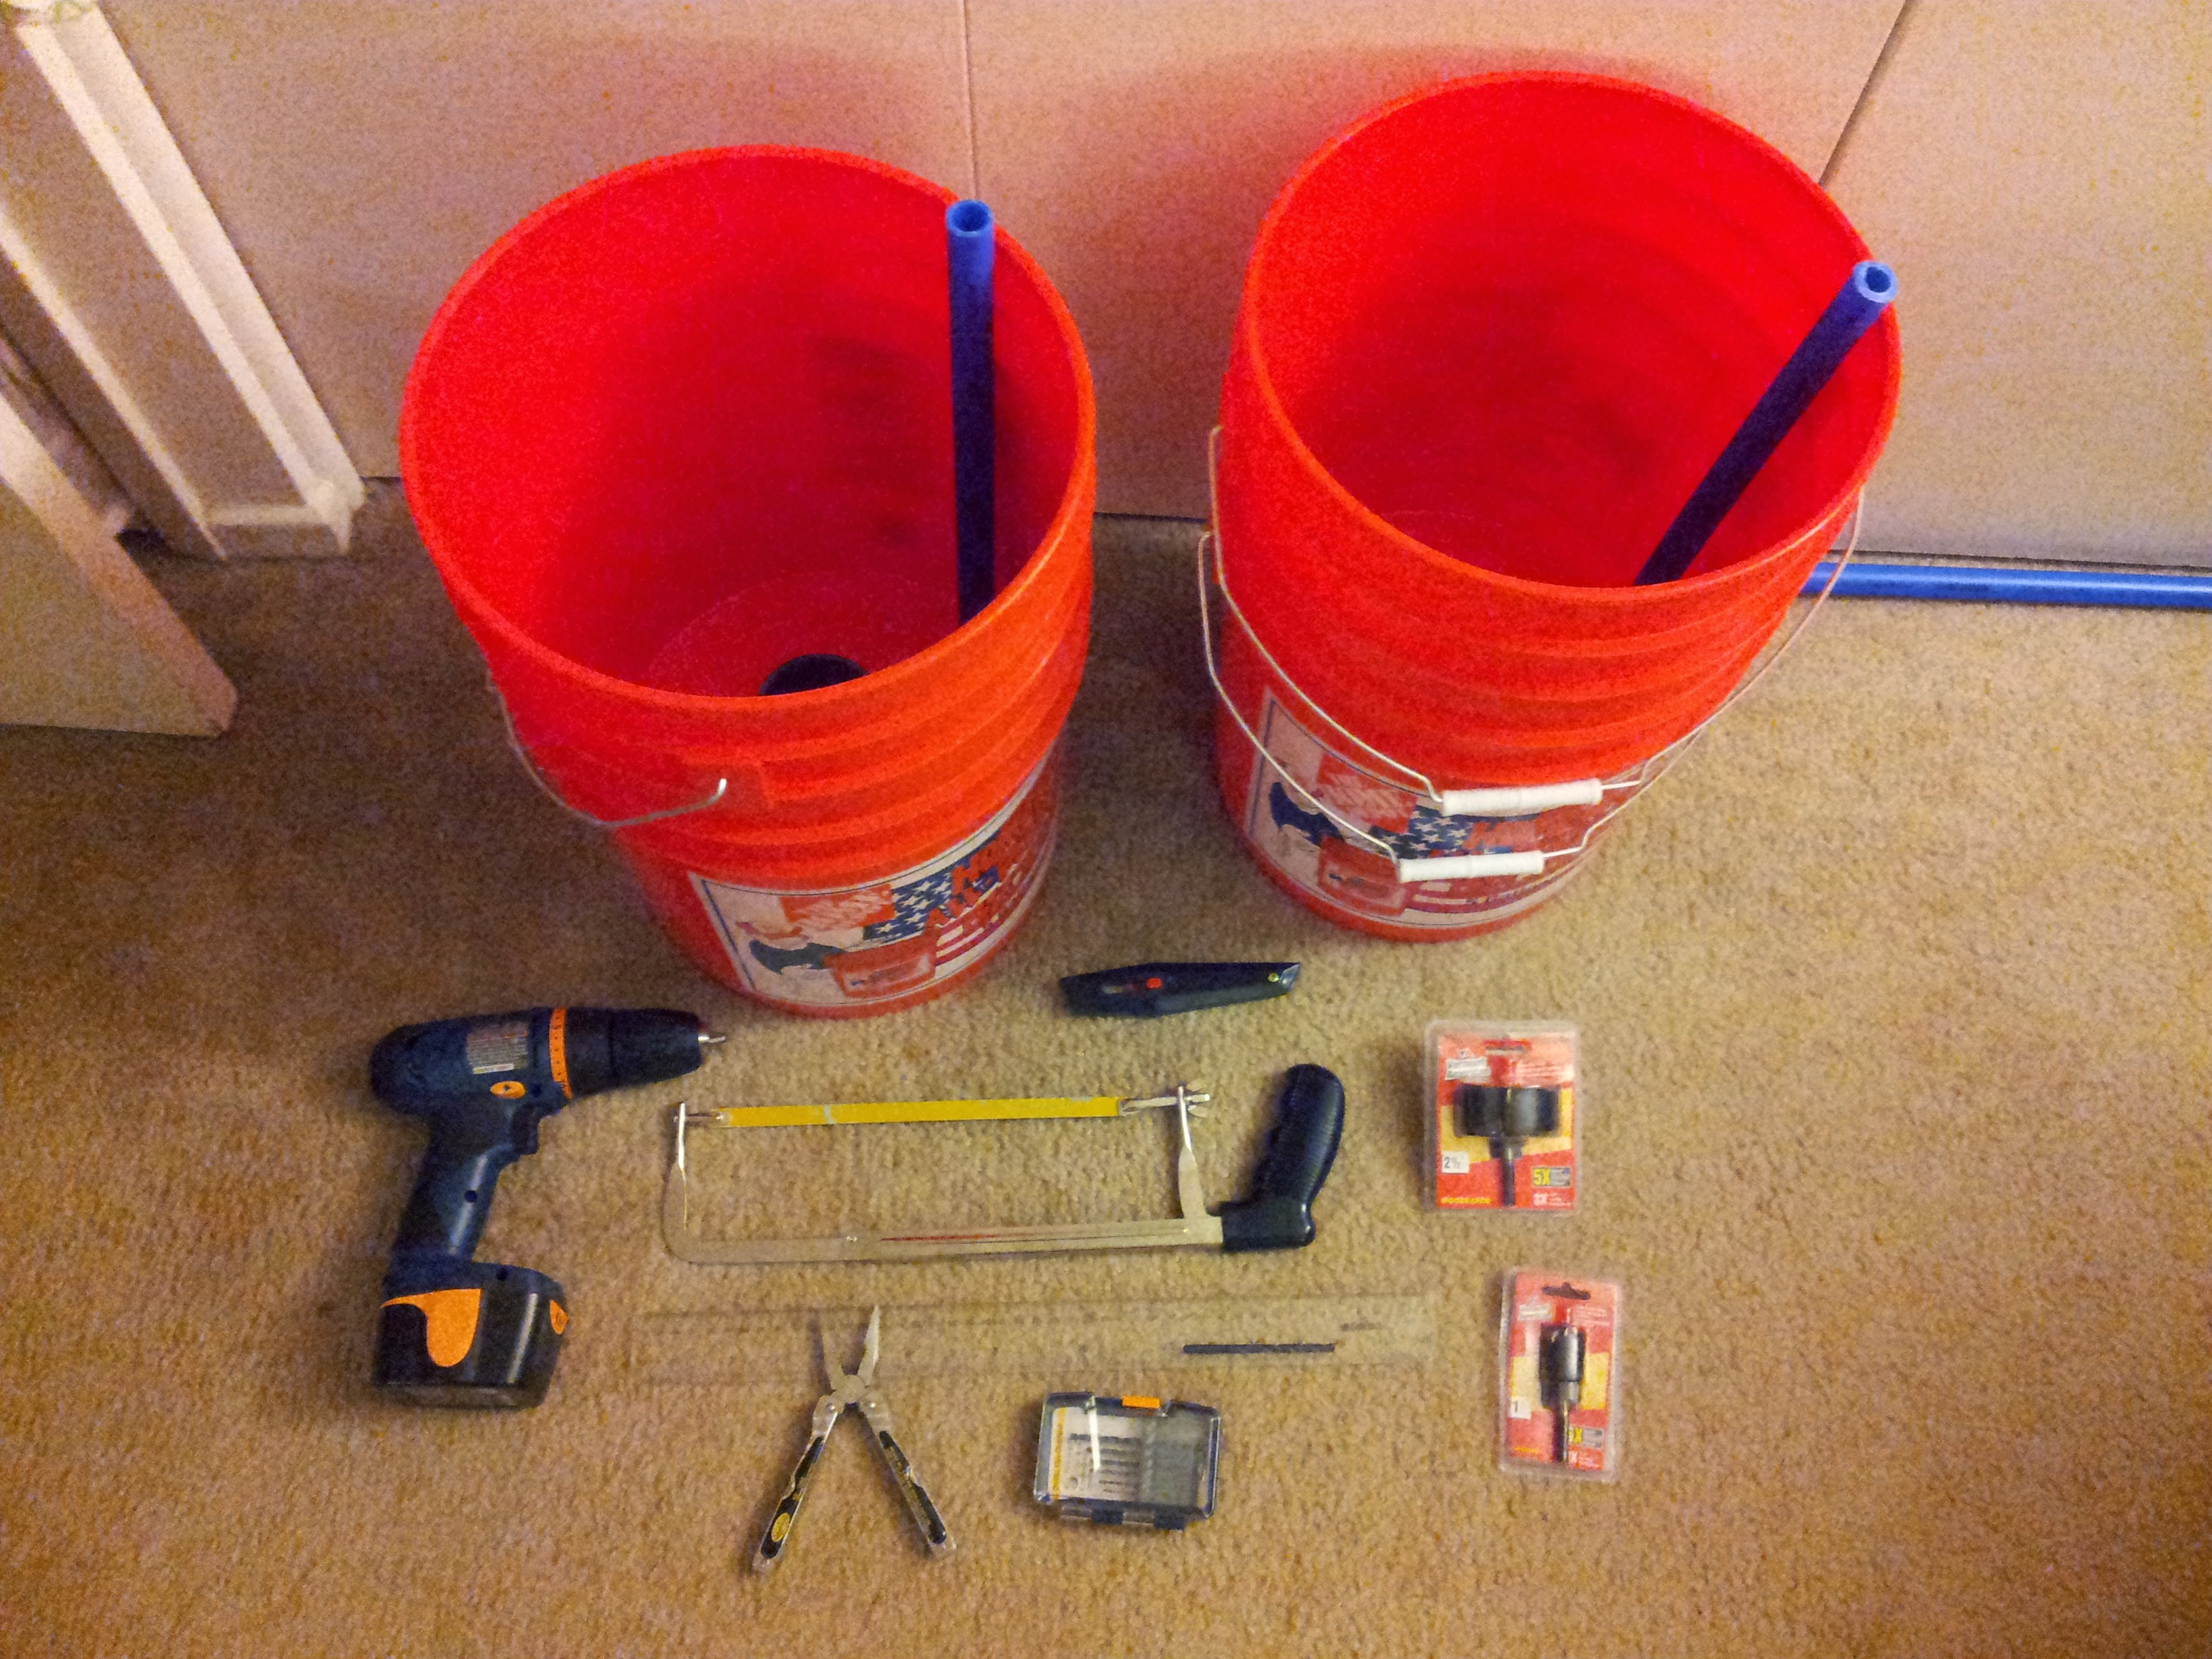
- Two (2) food-safe 5-gallon buckets (if using recycled buckets, make sure they’ve not been previously used to hold caustic and/or toxic substances)
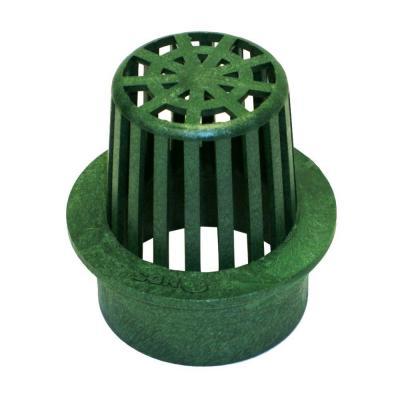
- One (1) 3-inch atrium drain
- One (1) 20-inch length of 1/2-inch PVC rated for use with drinking water (if you get a longer length, you’ll also need a hacksaw to cut it down into shorter pieces)
- A power drill
- A 1/4-inch drill bit
- A 3-inch hole saw
- A 1-inch hole saw
Watch the video below for specific how-to guidance.
DIY Steps:
- Make sure that your buckets do not stick together when you put one inside the other. If you ever need to pull them apart for any reason and they stick together, you could be in trouble, particularly if they are full of soil and plants.
- Take the bucket that will be used as the planter and set the other bucket aside; the bucket you’ve set aside will serve as the reservoir for your self-watering container.
- Take your planter bucket and turn it upside down.
- Using the 3-inch hole saw, cut a hole in the center of the bottom of the planter bucket.
- Using the 1-inch hole saw, cut a hole to the side of the bottom of the planter bucket near the edge.
- Using the 1/4-inch drill bit, drill a bunch of holes all over the bottom of the bucket but leave enough space between them to maintain the structural integrity of the bottom of the bucket.
- Place the planter bucket inside the reservoir bucket.
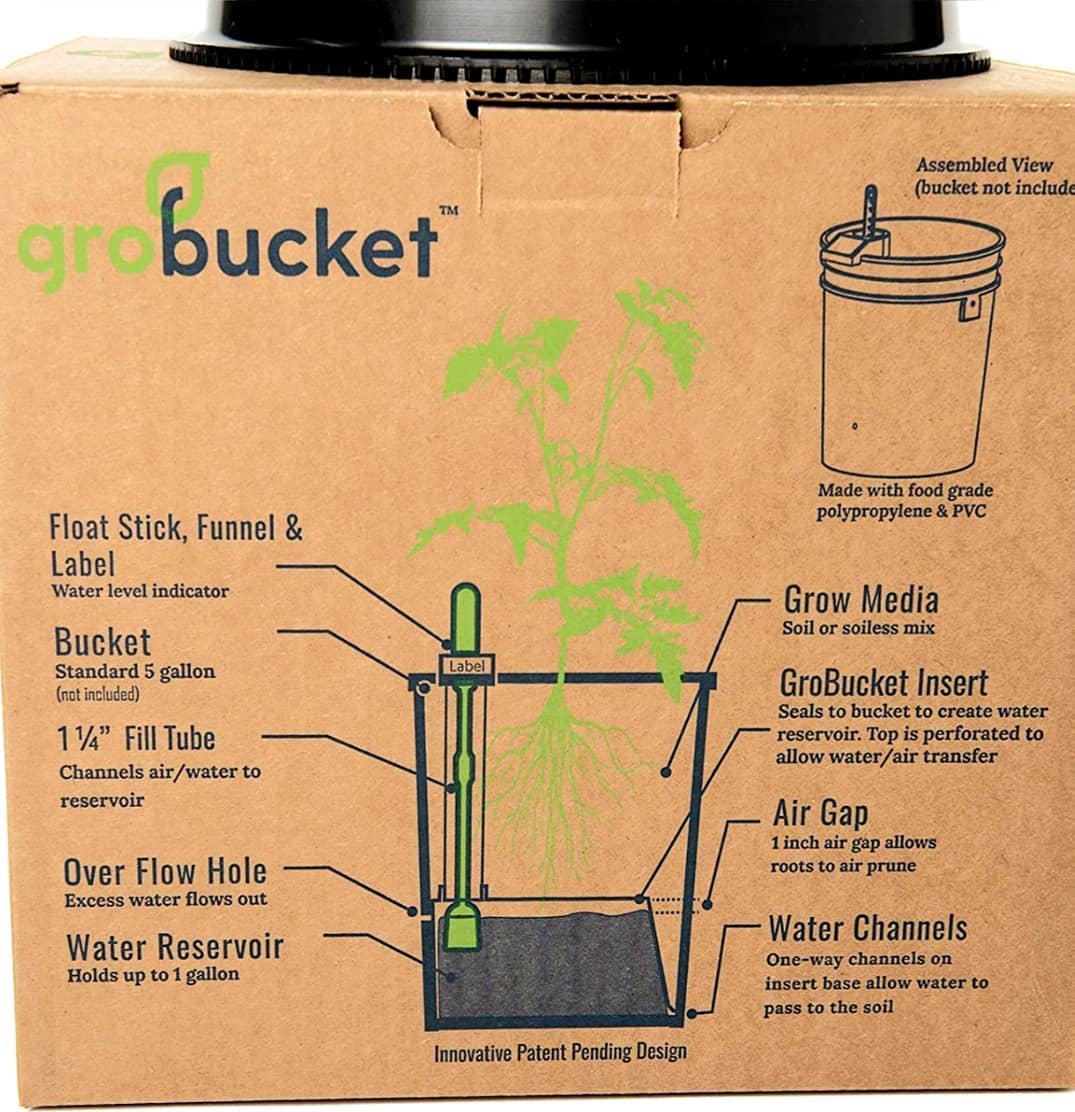
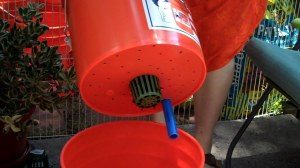
- Take the atrium drain and insert it upside-down (open end up) into the 3-inch hole at the bottom of the planter bucket.
- Insert the PVC through the 1-inch hole
- Fill the planter bucket with soil
Once your bucket containers are built, mark on the outside of each lower bucket where the bottom of the upper bucket sits, then mark a spot a 1/4 inch below that. Drill a hole at the lower mark. This is called a weep hole. You want a gap of air between the top of the water level in the lower bucket and the bottom of the upper bucket so that proper drainage of the upper bucket can occur. It won’t drain if it’s sitting in the water. The weep hole keeps the water level from raising too high by providing over-flow drainage.
If you have children who may tend to over-water things, if your buckets are too dark to see through to know how much water is in the reservoir without pulling them apart, or if you’re gardening with someone with memory problems who may accidentally water things too often because he/she can’t remember having watered them before, you need a weep hole to prevent over-watering. Even if you don’t over-water, a sudden downpour could still drown your plants without adequate drainage. See the images below (click on them to see a larger image of each).

How It Works
All the little holes you drilled in the bottom of the upper bucket provide drainage for the soil that the upper bucket holds. If the soil gets saturated, the water will work it’s way down into the reservoir through all those little holes.
The atrium drain in the bottom of the upper bucket fills with soil when you fill the whole upper bucket and dangles down into the reservoir from the upper bucket’s underside, wicking water up into the soil as it is needed by your plants. Click on the image below to see a larger version and the draining and wicking details will become more clear.
The PVC pipe is the tube through which you refill your reservoir when it runs low on water. You will know when your reservoirs are full when water comes out of the weep holes as you are refilling them.

See GroBuddy and GroBucket kits in our online store