Start Non-GMO Fruits & Veggies from Seeds
 Planting fruits and vegetables from seeds isn’t all that hard. Many people prefer to buy established young plants because it takes less time for them to go from planting to eating, but those young plants had to come from somewhere. Someone else took the time to start them from seeds and then sold them to gardeners.
The problem with this is that, unless you know and trust the person or company who got those seeds and planted them, you really have no idea what was planted and, thus, have no idea exactly what you’ve gotten in terms of your young plants. If you are looking to keep GMOs out of your garden, then starting from seeds may be safer.
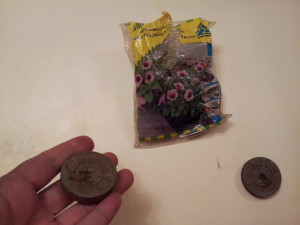
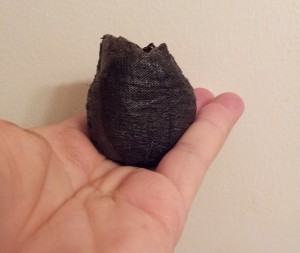
One of the easiest ways to start seeds is to use seedling pellets, such as the ones pictured here, though there are different brands and some may not be organic, so check. These little, flat discs are actually root- and water-permeable sacks filled with potting soil that have been dried out and compressed. They are easy to store, take up little space, are ecologically friendly, and totally work. Once they have been soaked in water, they expand to their full size and are ready to use.
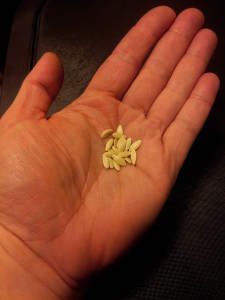
Once the pellets have expanded, you should usually put more than one seed in each to ensure that something sprouts in each one; the exception is large seeds like fava or lima beans. Not all seeds will germinate. However, this means that it is possible that more than one seed will sprout in a single pellet, in which case you will have to thin them down to a single sprout once they pop up. For large seeds, like beans or squash, put no more than 2 seeds in a pellet. For smaller seeds, like tomatoes or beets, put in 3 or 4.
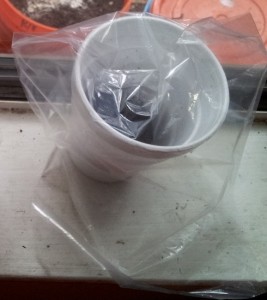
You need to put your seeded pellets someplace warm where they can’t dry out. If you have any kind of a greenhouse or greenhouse-like structure, you can put them in there. Otherwise, you can put them in little cups, cover them with plastic baggies, and set them on a warm windowsill.

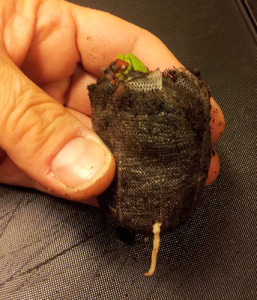 Once the seedlings have sprouted, their roots will grow out the bottoms and sides of their pellets. Once your seedlings are established enough in their pellets, you can transfer them to your containers for continued growing. When you plant them, the roots will continue to grow through the bag and into the surrounding soil. The little bag will biodegrade over time and the plant will be stable and established in the soil, having first established itself in the pellet.
Not all seeds are suited for starting in pellets, however. Some plants, like carrots, are better seeded directly into the top of the soil in a container and lightly watered from the top until they sprout, then thinned until they’re about 3 inches apart. (With carrots, thin them slowly over time and enjoy increasingly larger little baby carrots as snacks along the way – just wash them before eating them!)
Watch the red kidney bean seedling pictured above sprout in this time-lapse video!
Other plants, such as herbs, do better in traditional terra cotta pots than in self-watering bucket containers; the extremes of getting a little too dry and then a little too wet tend to make herbs more aromatic and flavorful, which means that you have to control their water intake. Short of a sophisticated watering system, this means watering them by hand and keeping a watchful eye so as not to drown or dehydrate them. Self-watering containers deliver a consistent, steady supply of water to the roots of their plants, which prevents the kinds of extremes that bring out the flavors in herbs.
Whether directly seeding into your bucket containers or transplanting seedlings into them, be sure that there is enough water in the reservoir of each one and that, when planting for the first time, you water each one moderately from the top in order to get the wicking action fully underway. For more information on how self-watering bucket containers work, click here.